• Setting up SSH / SFTP on Steam Deck

    Date Posted:

    Having SSH and SFTP access to your steam deck is very convenient for file transfers and remote administration, setting it up is fairly straightforward.

    First you need to have set your password to be able to use sudo, to do this open konsole in desktop mode and type passwd, enter your desired password twice to confirm.

    Once that is done you can turn on the SSH server with sudo systemctl start sshd, to login from another system on your network use ssh deck@192.168.x.x, replace with the LAN address of your deck.

    Security

    To prevent anyone else logging in, edit /etc/ssh/sshd_config, add the following two lines:

    AllowUsers deck@192.168.0.0/16
    PermitRootLogin no

    Restart the server with sudo systemctl restart sshd, this will only allow a login from your local network, if you want to login from the internet then more stringent security is required which is covered in an article here.

    To permanently enable the server use sudo systemctl enable sshd.


  • LiteVNA Review

    Date Posted:

    LiteVNA64

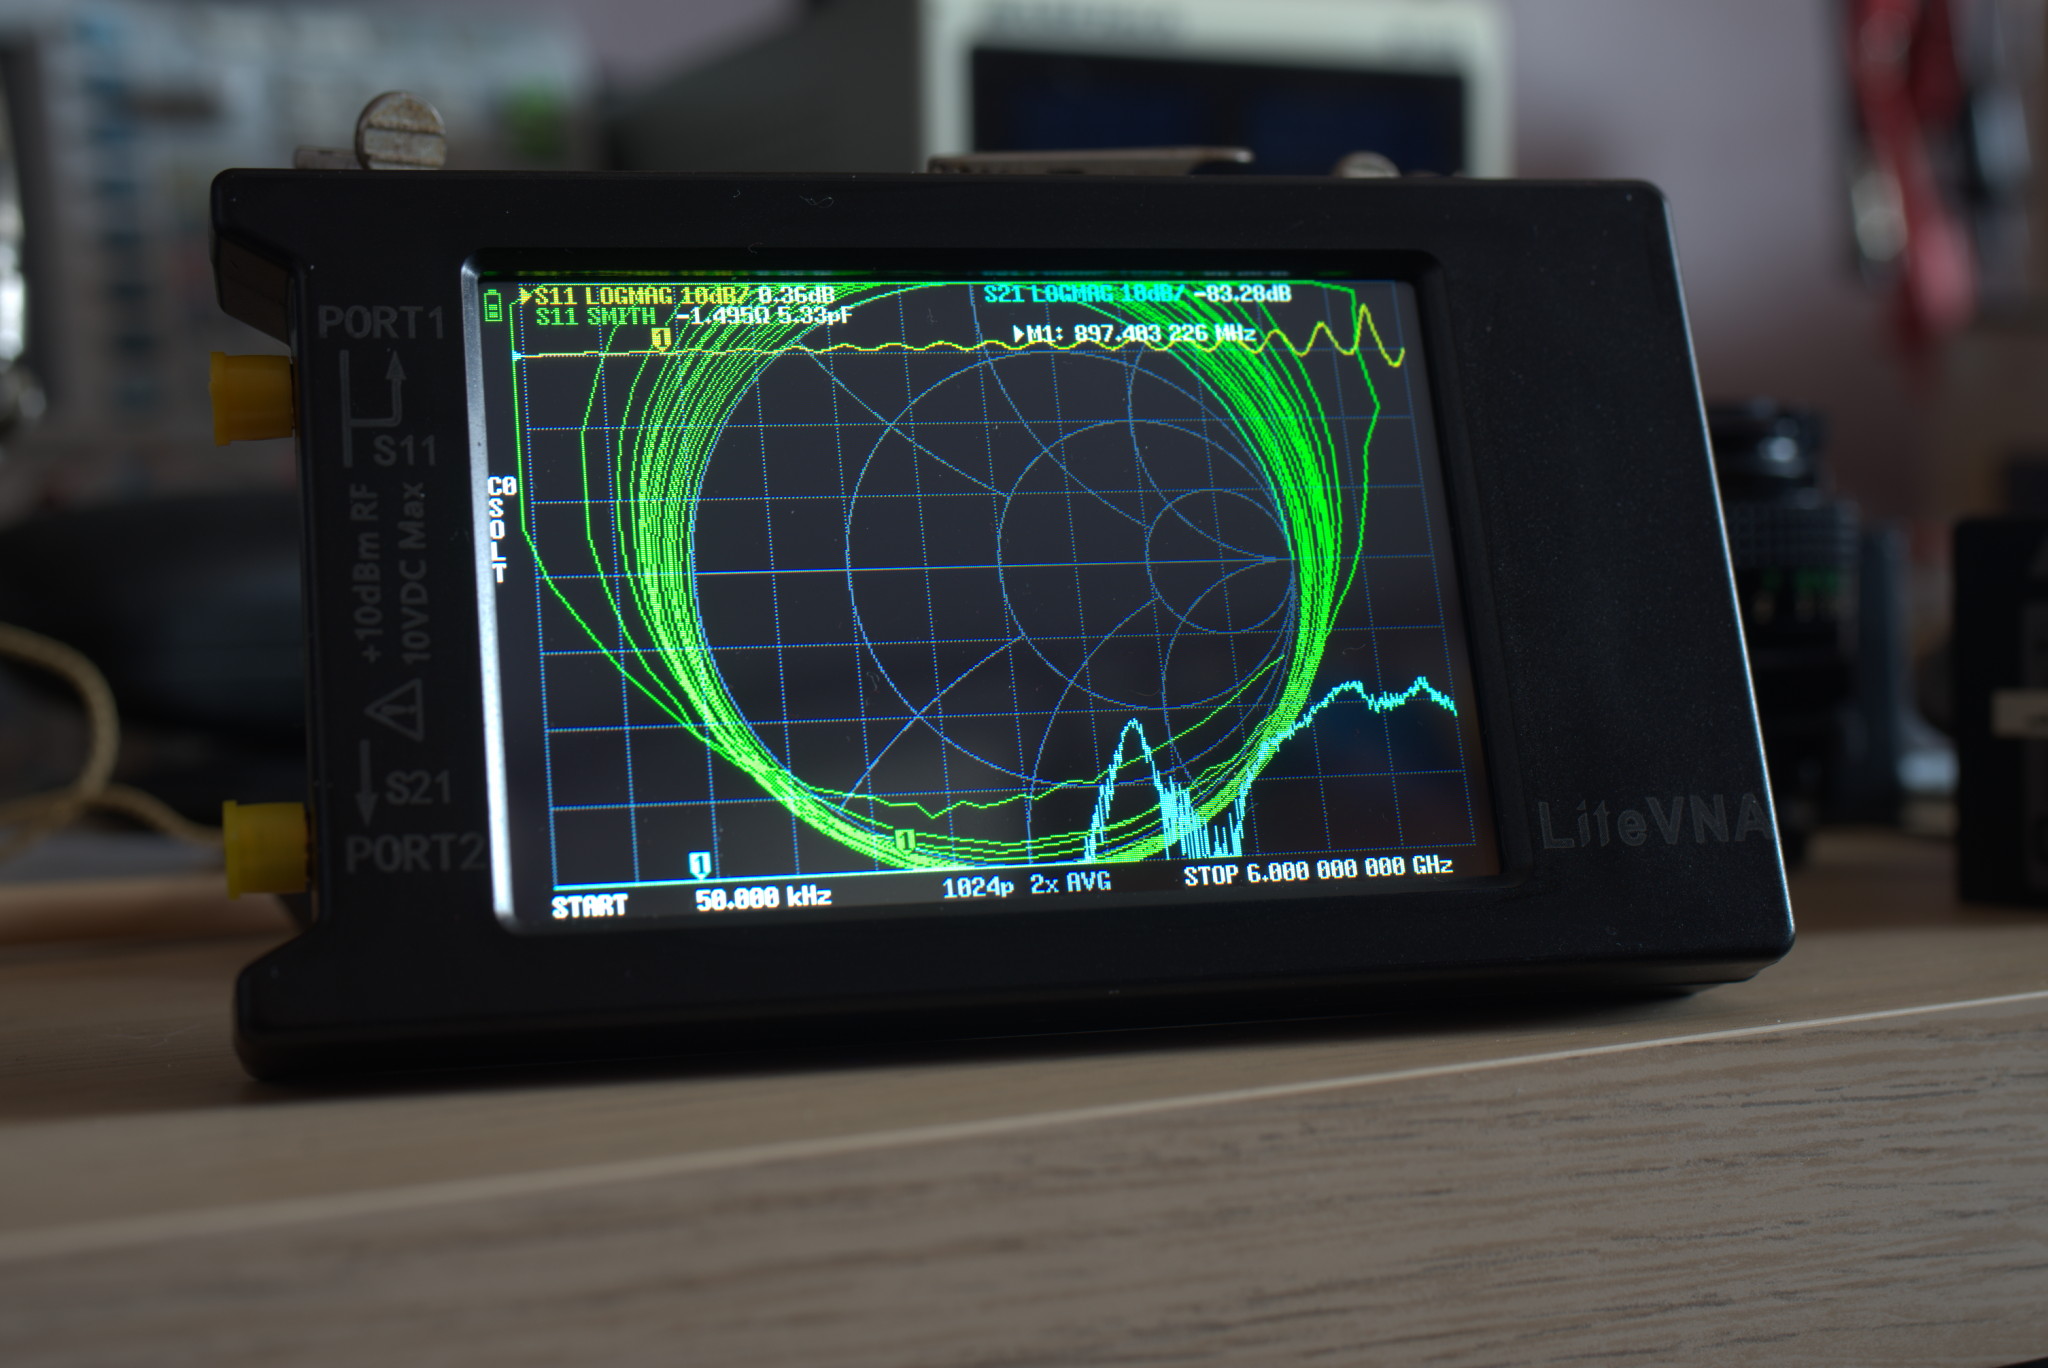
    The LiteVNA is a portable vector network analyser, it offers reasonable performance for a very low price, making it an ideal tool for electronics hobbyists and amateur radio operators, it can be had for under £100 from China.

    For those who are not familiar with a VNA, it measures the amplitude and phase response of a circuit or device over a wide range of frequencies, this is often used for the characterisation of filters, antennas, components, resonant circuits, coaxial cables, amplifiers and much more, if you do any kind of work with RF this is a must have tool.

    The LiteVNA is an evolution of the NanoVNA which was cloned and enhanced by various companies producing a number of different versions, rather than confuse you with a long list I will just say the current best options are the LiteVNA and the more professional LibreVNA, buying anything else is essentially a waste of money.

    Design & Build

    In terms of design there is only so much I can say as it’s closed source to prevent a flood of bad quality clones, and to be honest I’m not entirely qualified to go into the details, suffice to say it’s a two port T/R only VNA that can operate between 50 kHz and 6.3 GHz, with even higher possible using harmonics, the performance is rather average, but considering a good mainstream VNA will set you back at least £1500 it’s impossible to find a fault with it.

    The LiteVNA is of a surprisingly high build quality, it has a sturdy plastic case and feels like a solid piece of test equipment, it comes nicely packaged in a box that includes a SMA calibration kit, two SS405 coaxial cables (SMA male), SMA female to female adapter, USB-C cable and a carry strap.

    For input it has a color LCD touchscreen and a jog switch, the screen can be flipped in software and it uses a simple yet effective user interface, the USB-C is used for charging as well as communication with software available for Windows, Linux and Mac OSX, a MicroSD card can also be used to optionally save screenshots and data (provided it’s under 32GB in size).

    It’s available in two different models, the 62 and 64, aside from screen size they are practically identical, but I’d suggest going for the 64 as it isn’t really that much more expensive and the bigger screen helps.

    Practical Examples

    Here are some examples that highlight how useful the LiteVNA can be and why you should really have one.

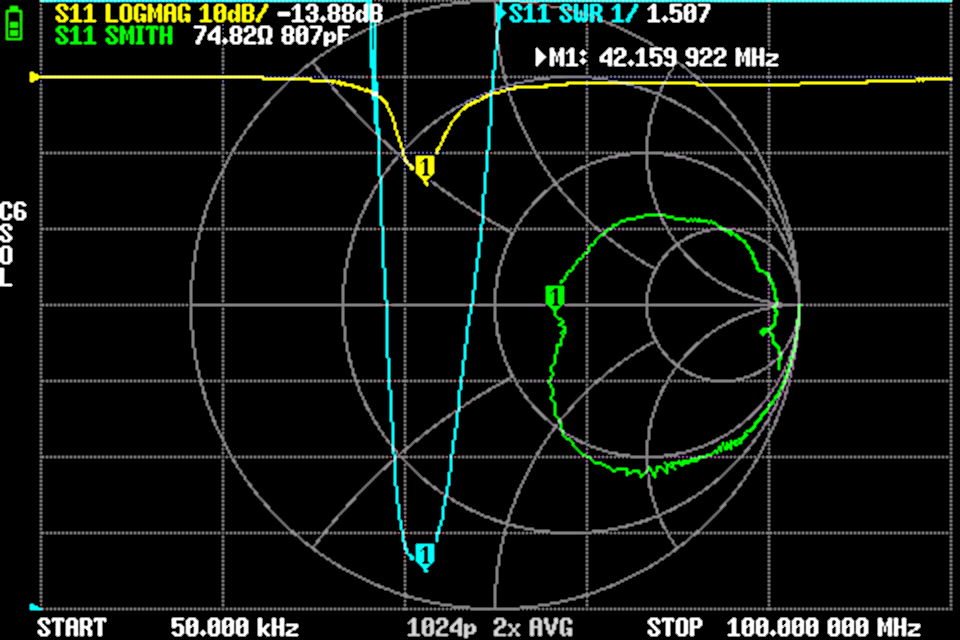
    The first is a measurement of an adjustable monopole antenna that has been extended to about 1.7 meters, as you can see there is a fairly decent match at 42MHz, which as expected is roughly 1/4 the length of the antenna.

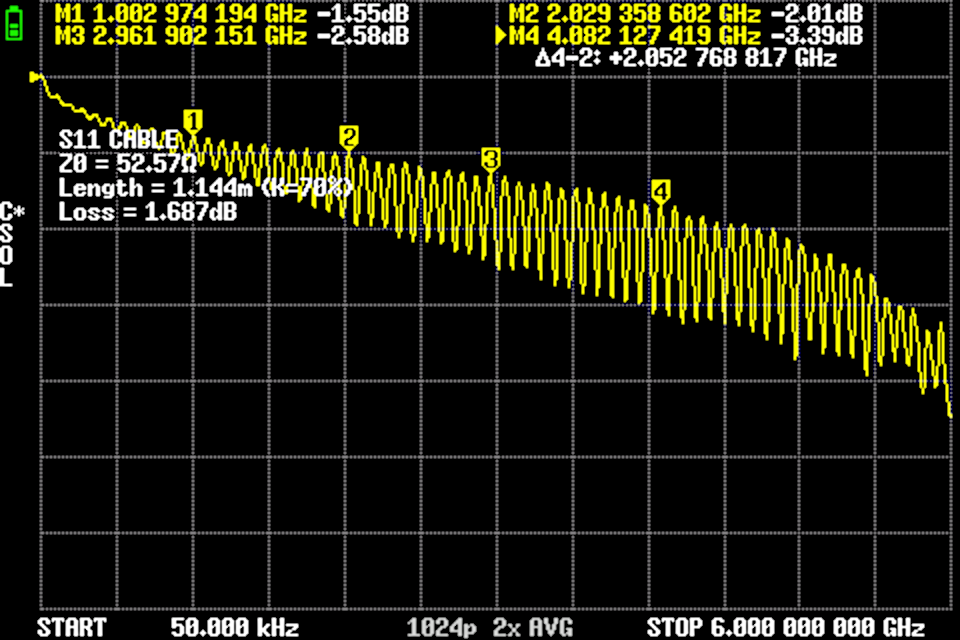
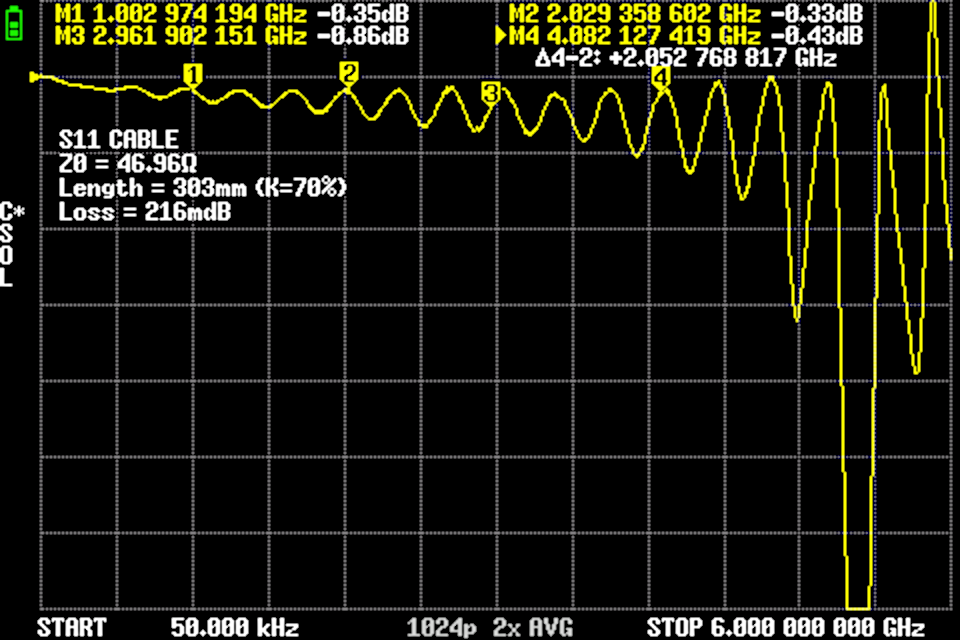
    The next two are cable loss measurements up to 6 GHz of two different cables, the first is a very cheap cable, whilst the second is the better quality SS405 that came with it.

    I could go on but you get the idea, the LiteVNA has many useful applications.

    Conclusion

    If you don’t already have a VNA then this is a must have addition to any electronics lab or radio shack, for the price it’s quite hard to find a reason not to have one, of course if you do own a higher quality one this is probably useless, although being so portable and compact it can be a nice addition.

    Also make sure you get it from a reliable seller, I highly recommend the following two sellers:
    Aliexpress
    BangGood

    Make sure you update the firmware to the latest once you get it.

    Categories:


  • Crystal Radio Improvements

    Date Posted:

    Previously I made a basic crystal radio, since then I’ve made a number of design improvements.

    Crystal Radio Schematic

    Multiple Bands

    There is only a few medium wave stations where I live so I decided to add shortwave as well, to achieve this I used a rotary switch and a 7uH inductor, this is wound on a T50-2 iron oxide toroid, this ensures a high Q factor that would be difficult to achieve with an air core, Unfortunately it’s nearly impossible to tune as it covers near enough the entire shortwave band, so a bit of a failure on my part.

    Antenna Coupling

    Originally I used a fixed 10pF coupling capacitor, I have since replaced that with a 35pF variable trimmer capacitor, I find around 25-30pF to be optimal, although it’ll depend upon your antenna and how selective / sensitive you want it.

    Audio Amplifier

    To make listening more comfortable and improve reception of weak signals I made an audio amplifier, this can be switched in with a DPDT toggle switch and is powered from four AA batteries, this is capable of driving a 8 ohm loud speaker at a modest volume.

    The circuit is nothing special but works quite well, care needs to be taken with the input wiring to avoid hum, shielded or coaxial cable is best.

    Case

    This time I decided to make something half decent looking, I glued together some scrap MDF sheet to make a base and front panel, I then applied walnut wood veneer to the front and varnished it, on the front I mounted two 3.5mm jacks, one for crystal earphones and the other the amplifier output, the tuning capacitor, DPDT toggle switch, 1 pole 12 way rotary switch and the volume and gain pots.

    On a piece of brass sheet I have a BNC connector for the antenna input, I made a bit of a mess of the veneer during construction but oh well, lesson learned, don’t drill wood veneer.

    Results

    Adding an audio amplifier really boosts what can be received, another thing I have considered is adding a LNA (Low Noise Amplifier) as the RF front-end, however at this point it would make more sense to use a different radio technology.

    Overall I’m quite pleased with it but there is definitely room for improvement, but for now I’m done with crystal radios, my next attempt will likely be a regenerative or perhaps superheterodyne radio.