Inpainting is a technique that allows you to make more controlled changes to an existing image, it works by defining an area called a mask for Stable Diffusion to work on, this masked area is then processed and blended into the image to ideally give a natural looking result, this is primarily used to adjust and improve existing content such as hands, faces, objects, etc, but can also be used to add new content to a picture.
In this tutorial I will be showing you how to do it with Comfy UI using SDXL 1.0, along with the SDXL inpainting model which I strongly recommend for good inpainting (place this in ‘models/unet’), the same method will work for other models as well, SD 1.5 users may additionally want to use the inpainting control net.
Recommended Addons
I recommend installing ComfyI2I as it provides a lot of useful functionality when it comes to inpainting such as an improved mask editor, installation is easy and can be done via the following steps (ensure you have git installed on your system)
cd <path to ComfyUI>
.\venv\scripts\activate
cd custom_nodes
git clone https://github.com/ManglerFTW/ComfyI2I.git
cd ComfyI2I
pip -r requirements.txt
Basic Workflow
The first step is to produce an image you want to inpaint, once you have the image you can load it with a ‘load image’ node, to speed things up use the copy and paste to clipspace functionality, to make a mask simply right click on the load image node and click Open in MaskEditor, or if you installed ComfyI2I use Open in ComfyShop, then you just need to paint the area you want to change and click save, alternatively for more control paint a solid colour mask in an image editor and load it in with another Load Image node, you can then convert the loaded image to a mask with a Image to Mask node.
An example workflow of this is changing the hair colour of a person from brunette to blonde:
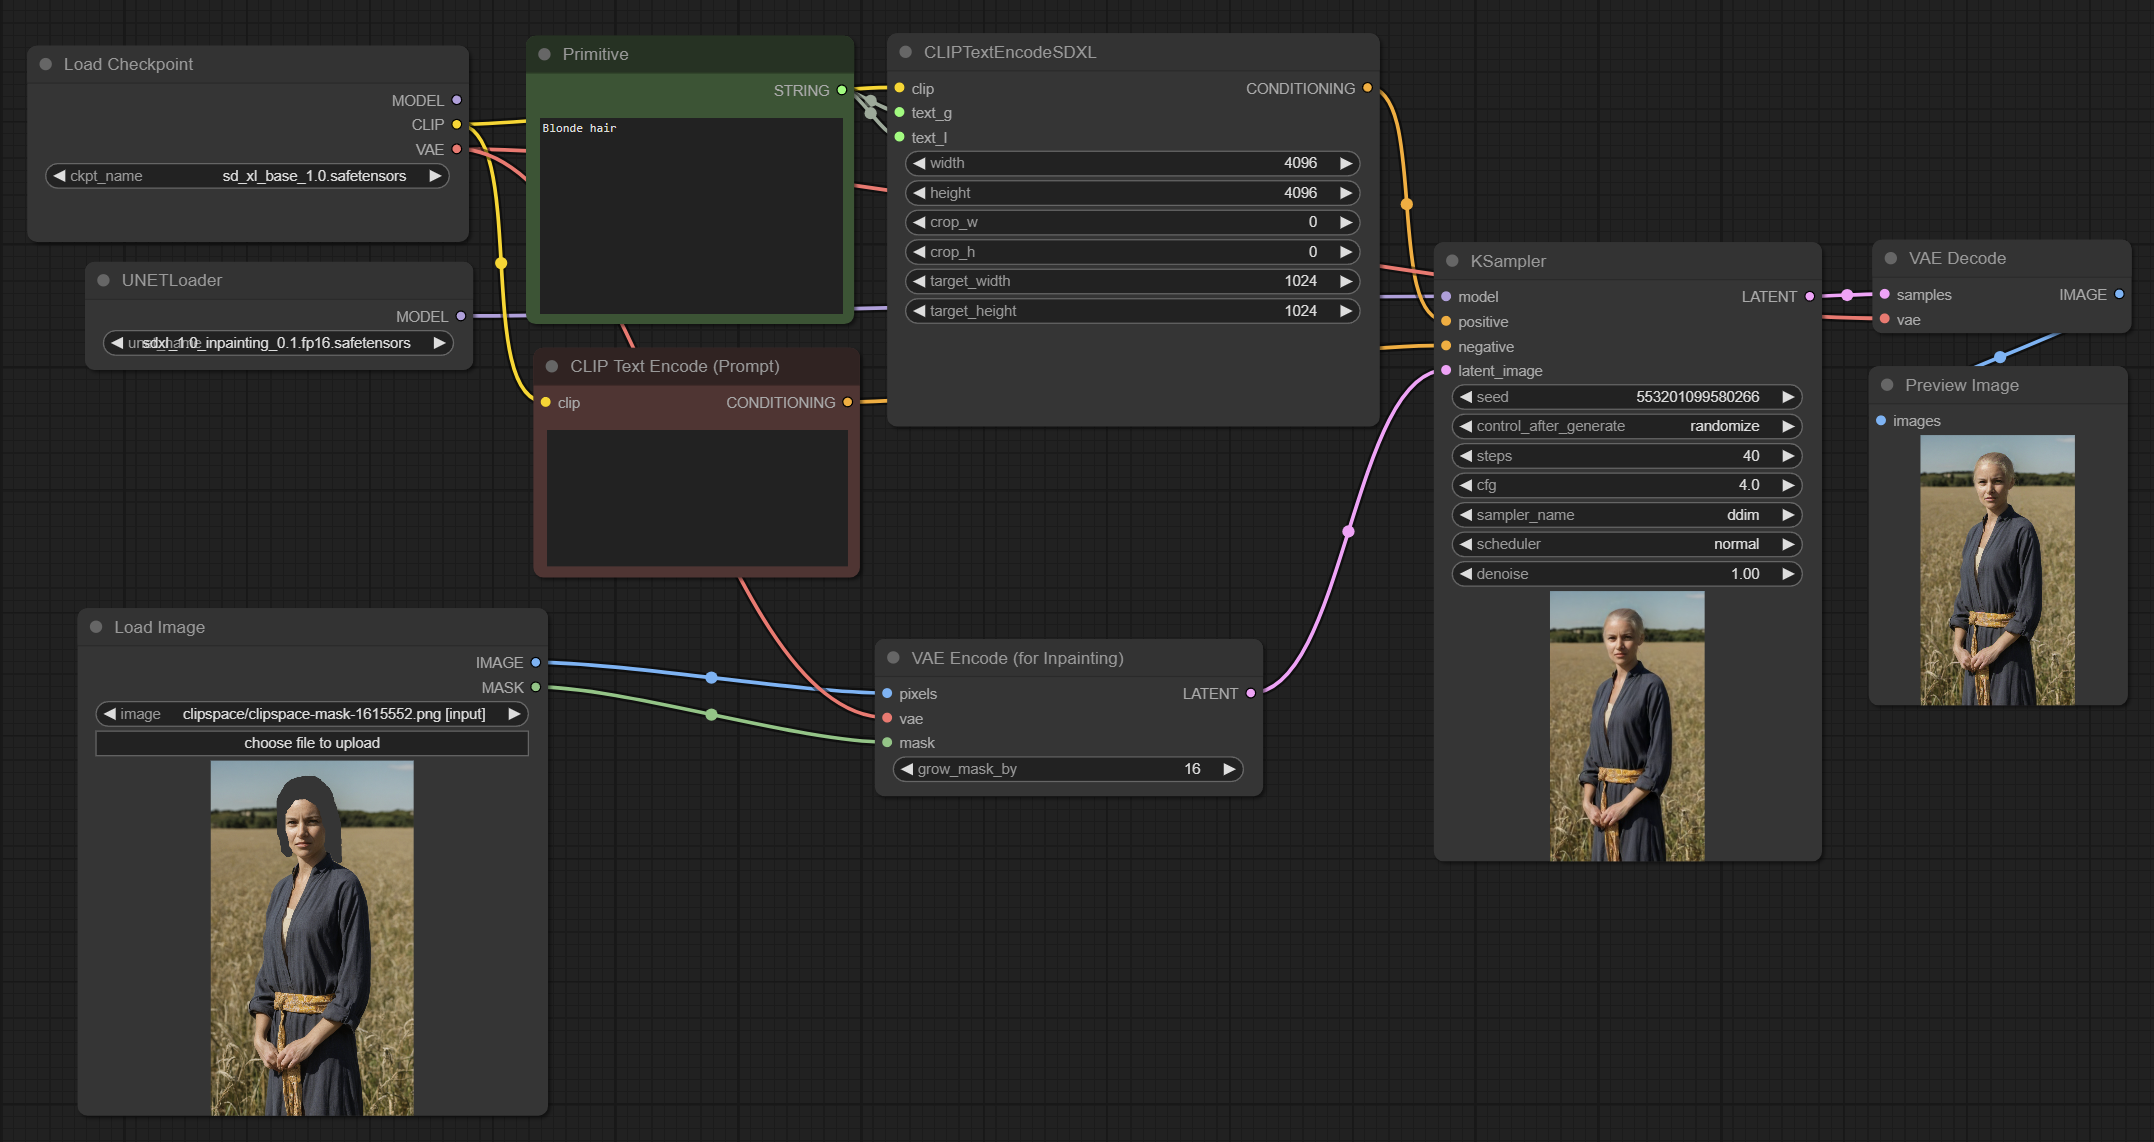
The only differences here from a regular image to image workflow is the inpainting model from the UNET Loader is used instead of the checkpoint model, also the image and mask is given to the VAE Encode (for inpainting) rather than a regular VAE Encode, as such you should make sure your loaded image is of a sensible resolution for your Stable Diffusion model, you can use an Image Scale node to ensure this or do it externally.
Advanced Workflow
One thing you may notice is the inpainting doesn’t work well on smaller areas and detail can be less than expected, this is because the inpainting is done with the whole image rather than just the area we want, to do full resolution inpainting we need to cut out the area we want to inpaint, scale it up, inpaint, scale it down and paste it back into the original image, fortunately ComfyI2I provides nodes specifically to do this, and it can work on multiple masked areas at once making it great for things such as face replacement and enhancement, fixing hands and so on.
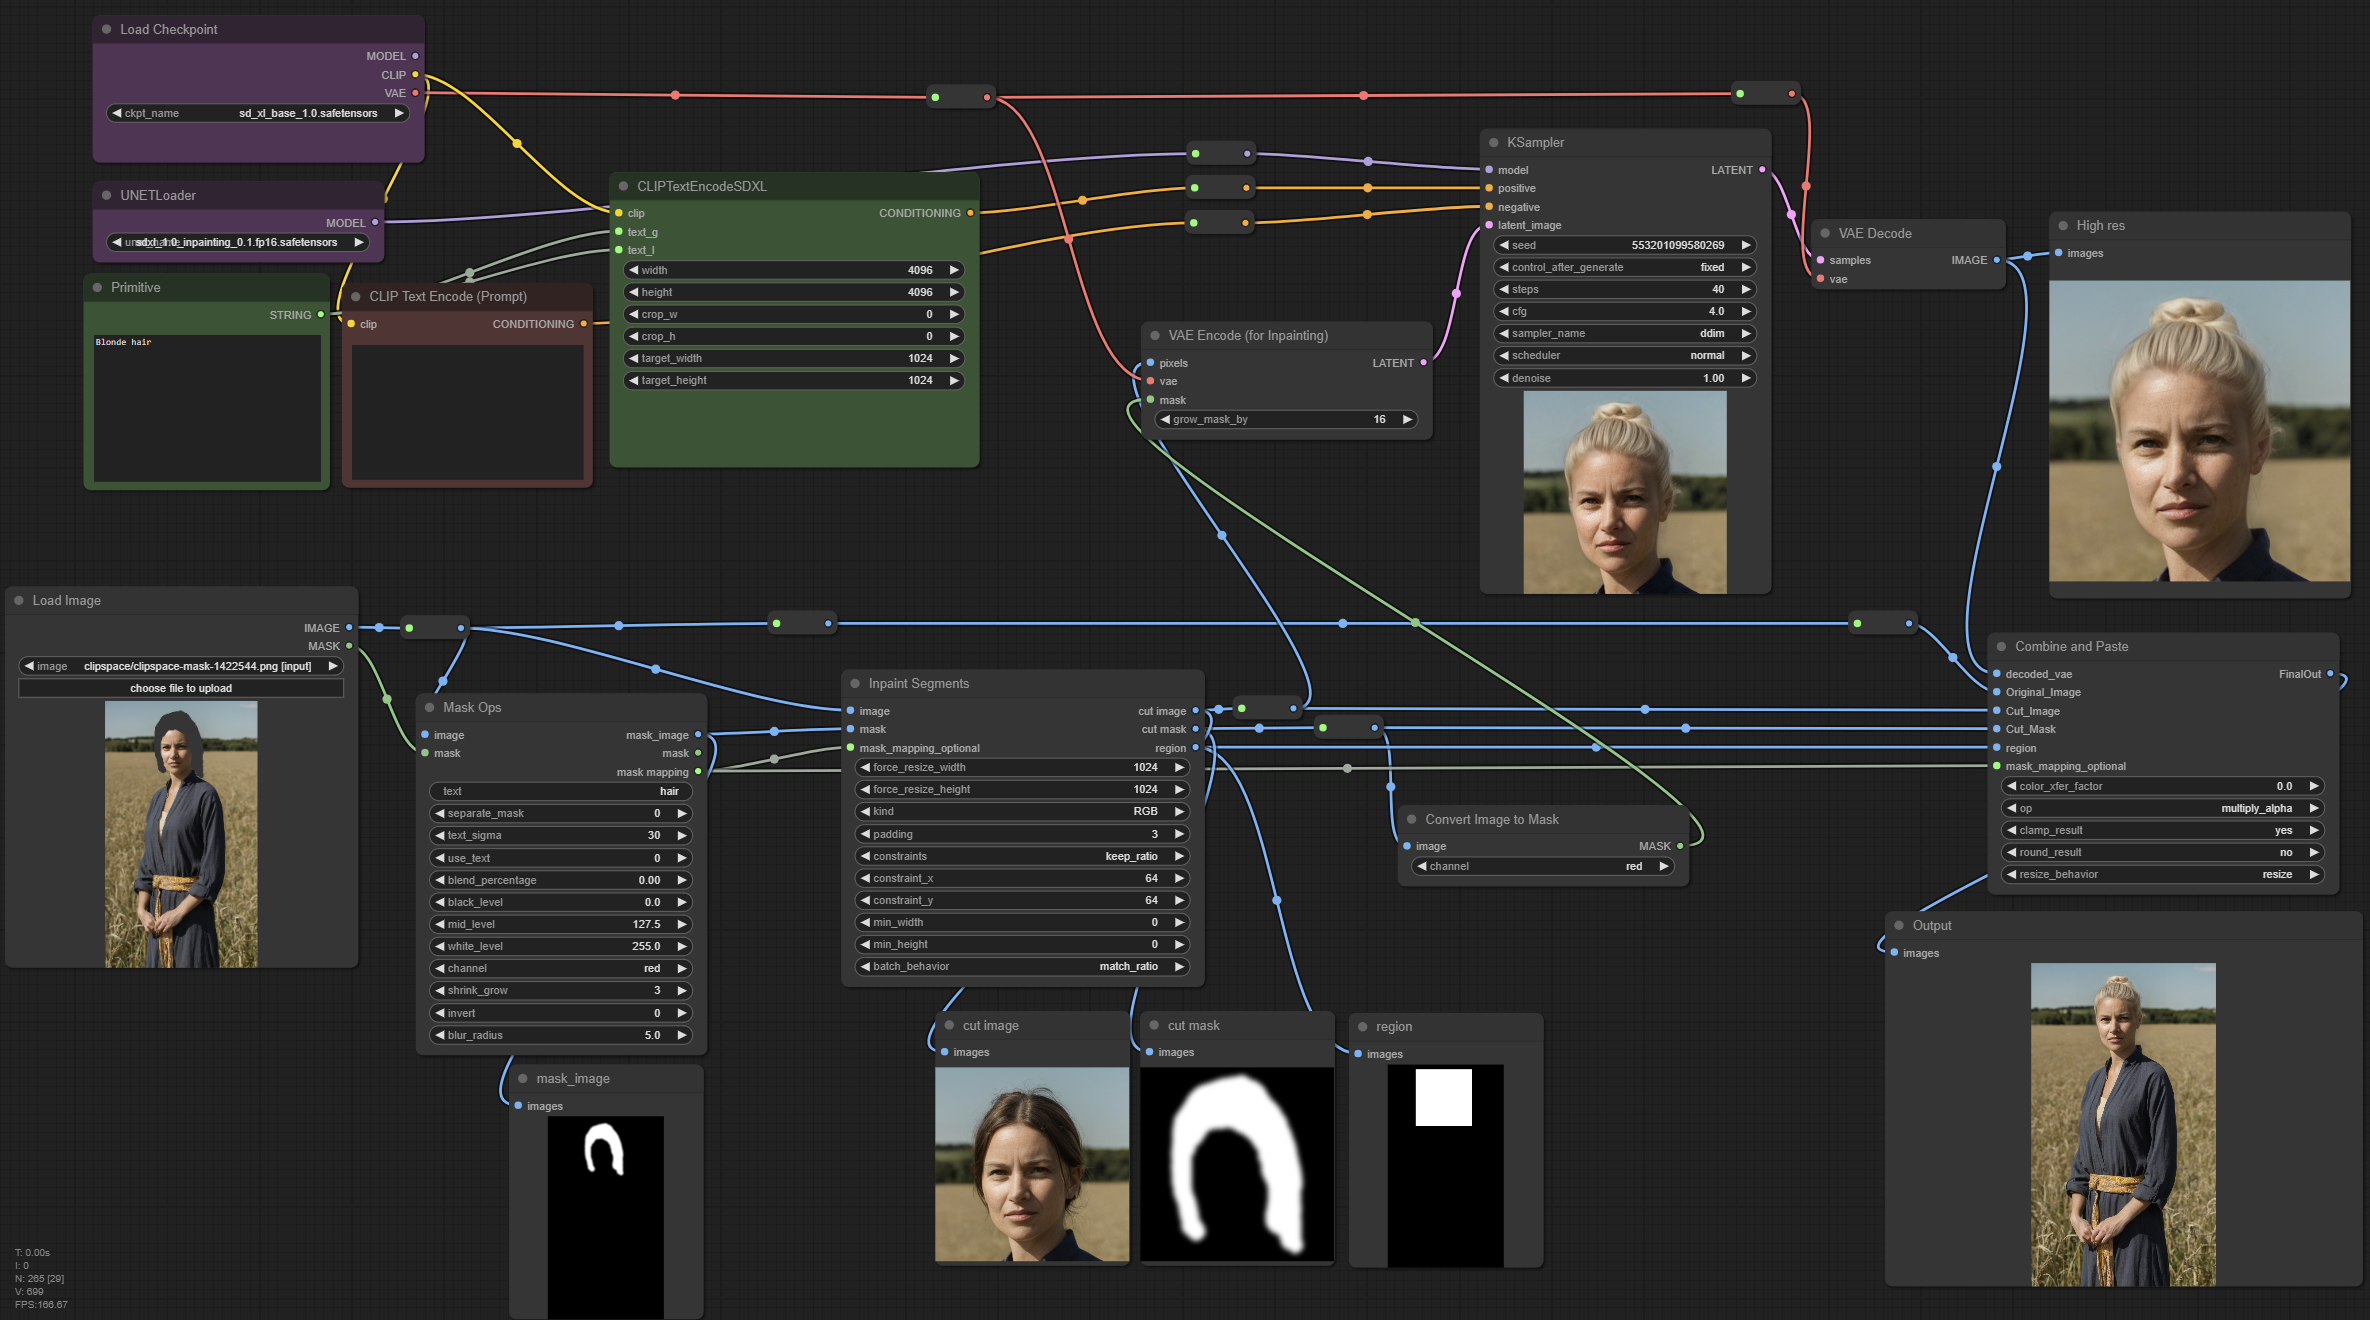
This may look quite complicated but it essentially boils down to doing what I said before, the Mask Ops and Inpaint Segments nodes chop up the image, giving us three things:
- Region Mask (rectangular mask of the area cut)
- Cut Image (image cut out of the region)
- Cut Mask (mask cut out of the region)
The cut mask is then sent to the VAE Encode (for inpainting) once converted with an Image to Mask node, as well as the cut image, this is then inpainted as normal before being merged back in to the original image with the Combine and Paste node, ComfyI2I has much more functionality including prompt based masking so don’t forget to check out the examples.
Outpainting
Outpainting lets you expand the image outwards while ideally avoiding any visible seams in the image, this isn’t perfect by itself and can be significantly improved by using control nets, for best results you should outpaint a relatively small amount of pixels at a time, 128 to 512 works well for SDXL.
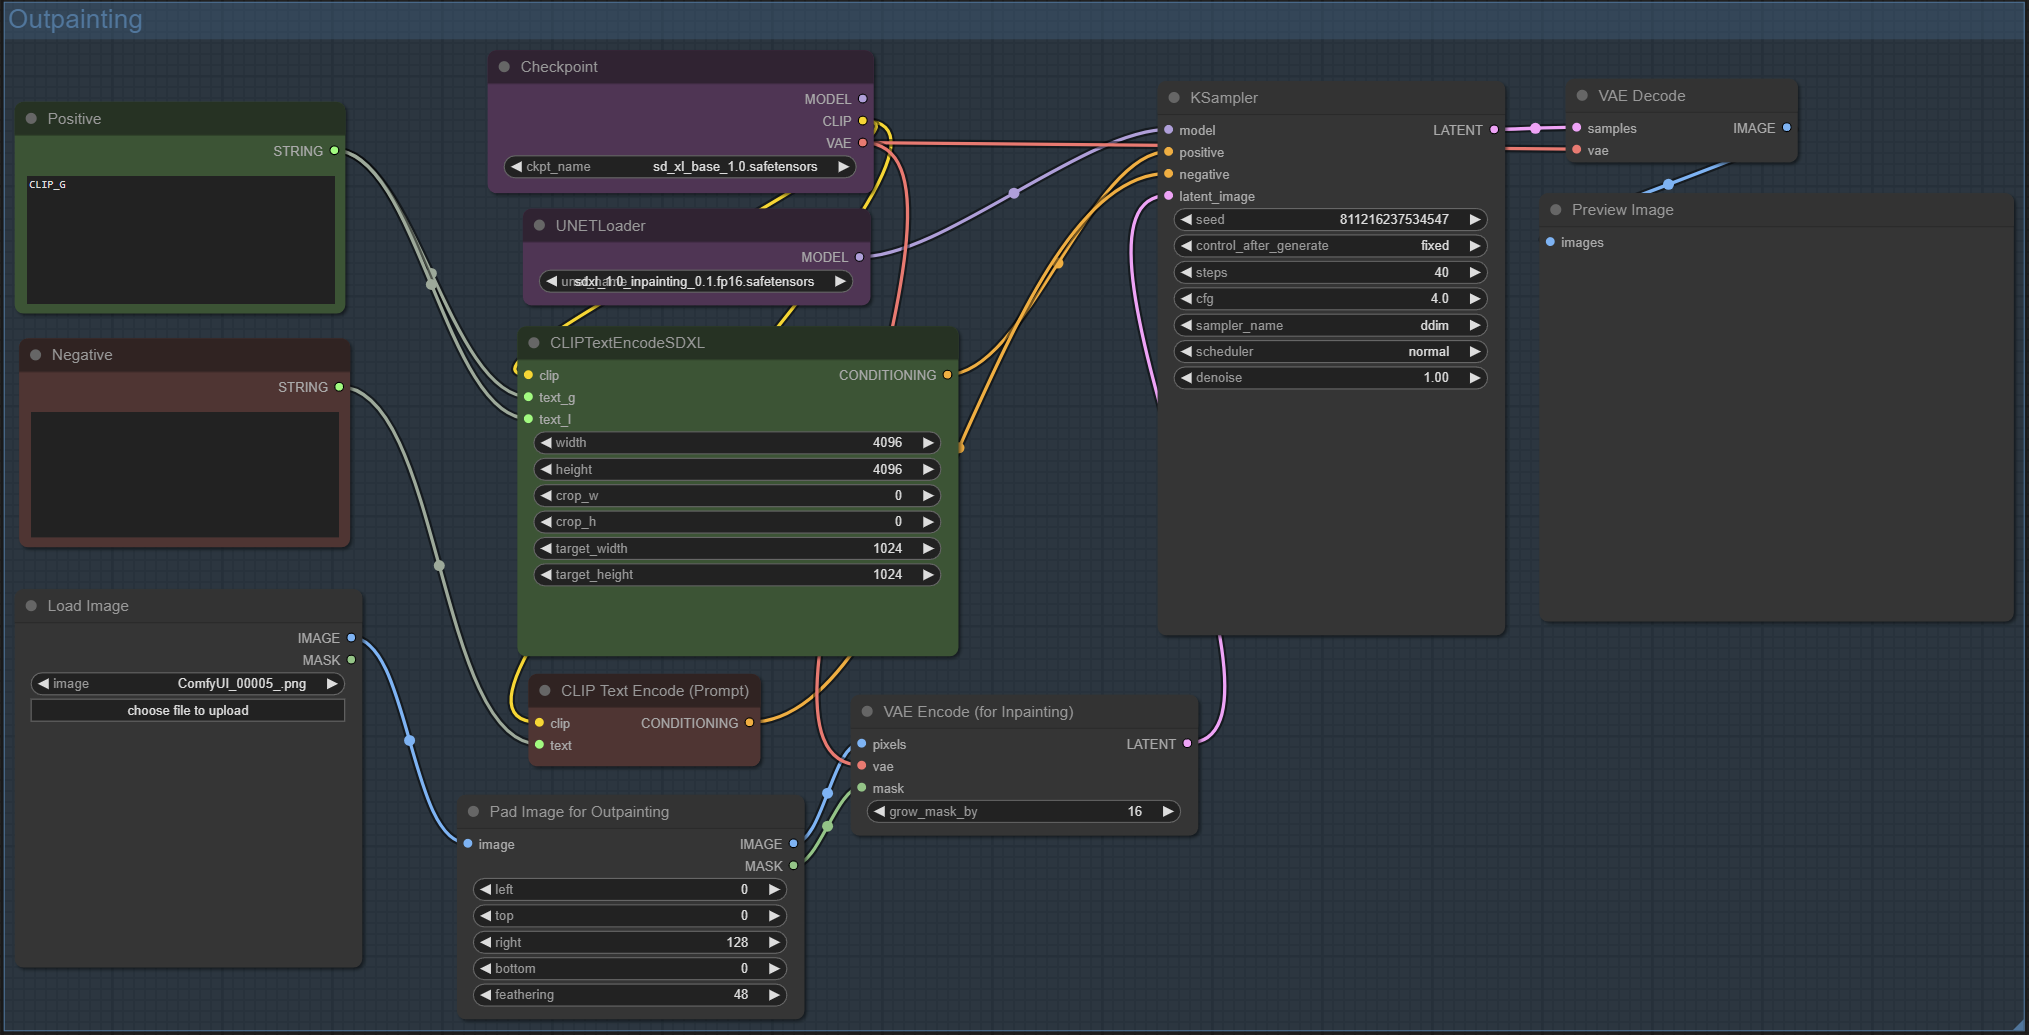
The workflow is nearly identical to inpainting except for the Pad Image for Outpainting node, if there is too much of a visible seam try adjust the feathering amount.
Conclusion
Proper use of inpainting can greatly enhance your images so it’s an important skill to learn if you want to get the most out of SD, you can also try use it to add new content to your images however you may find it struggles unless you make a rough drawing of what you want first and then inpaint over it, currently there is no inpainting control net for SDXL which may mean you get better results out of SD 1.5 models.